Tuesday, November 6, 2012

Mudslide Cupcakes

Chocolate Cupcake with a Bailey's and Kahlua Frosting Swirl


I came across this recipe from Endless Simmer a few months ago and it has been on my to-do list for forever! I love Mudslides and turning them into a cupcake sounded AMAZING! ... And it was!

I made these when we went away for the weekend to Bennett Springs for trout fishing. The cabin had limited cooking utensils and measuring cups (only teaspoons and a 2-cup glass measuring cup... No Tablespoons! I had to do a lot of converting!) But they seemed to turn out pretty good. still. I made the frosting with a hand mixer... because I wasn't about to transport my stand mixer....well I was, but my fiance convinced me to leave it behind.


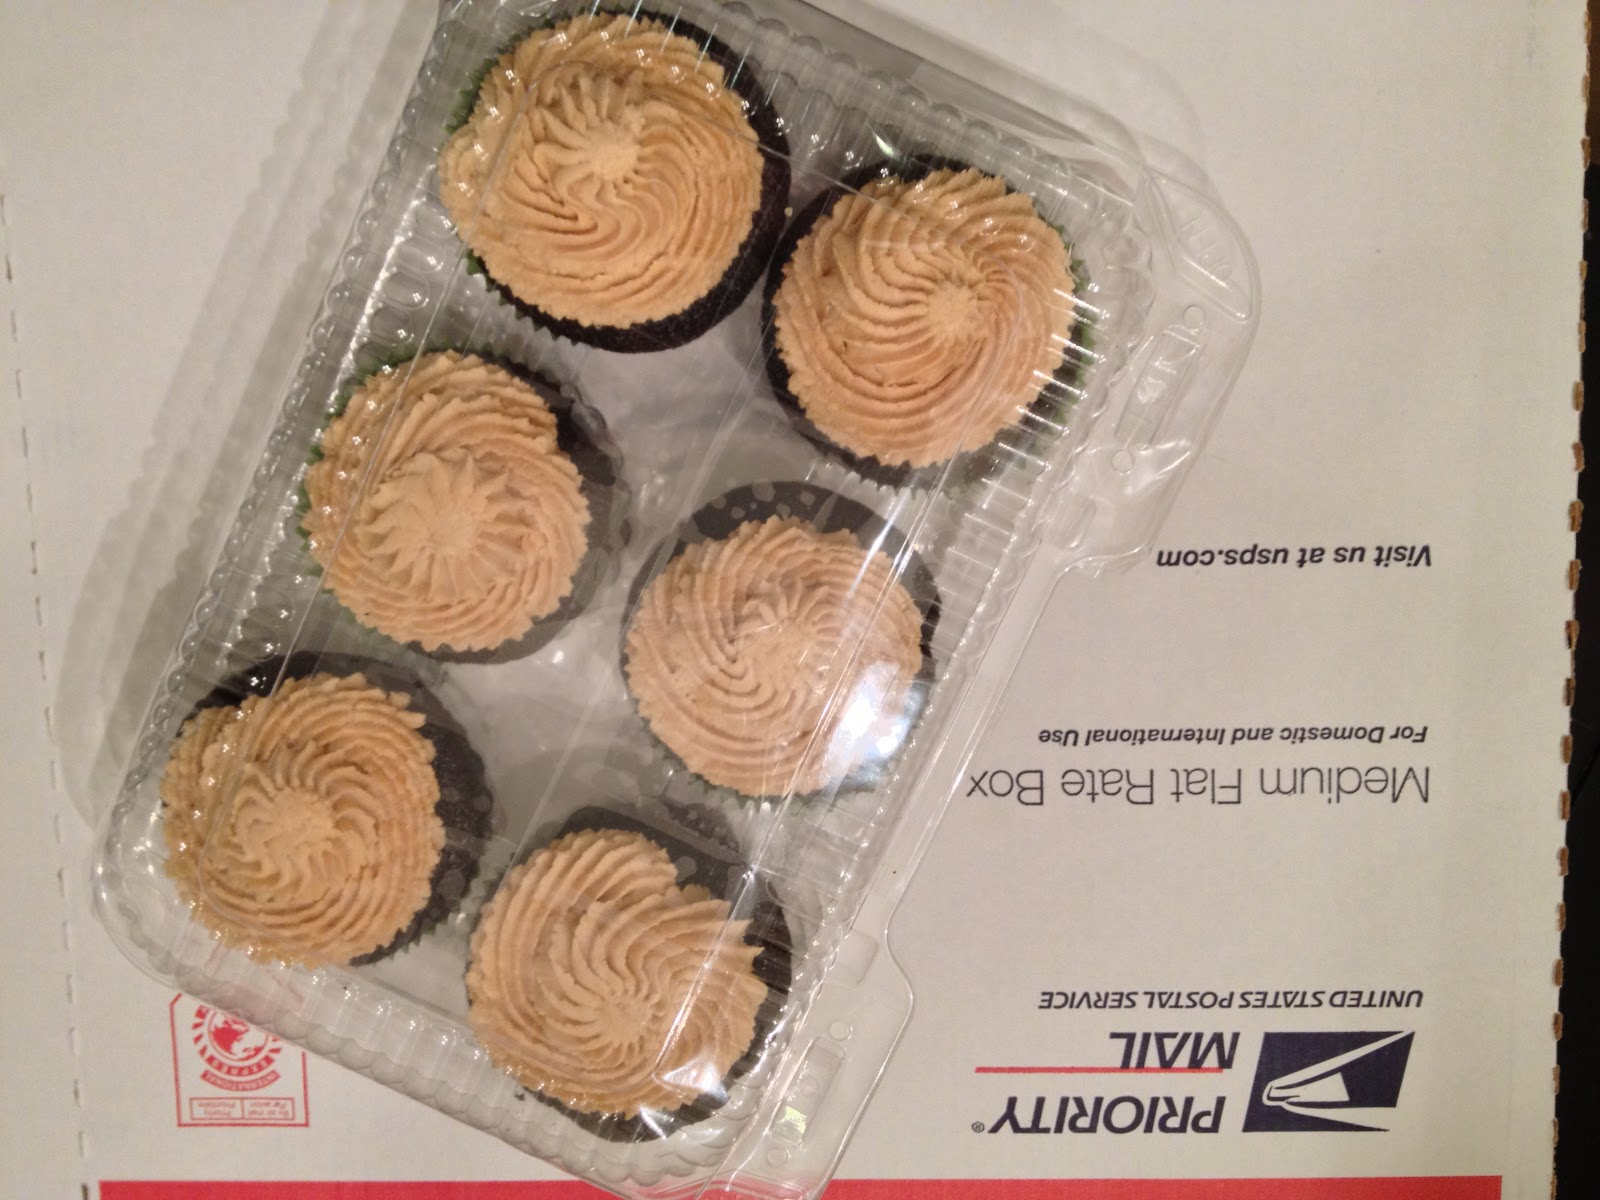
Doesn't the frosting look kind of like soft-serve ice cream?


And now for the recipe. I actually started sifting my flour a few weeks ago. Before, I always thought that was too much work and it couldn't possibly make a difference. Well, let me tell you, it absolutely does make a difference! The cupcakes come out super light and fluffy when you sift the flour, it is worth the extra step!

The only thing I really changed about this recipe was the Bailey's. The original recipe had you making your own home-made bailey's... but I used store-bought Bailey's instead. And it was delicious in my hot chocolate later that night! ;)

Chocolate Cupcakes

  • 3/4 cup unsweetened cocoa powder
  • 1 1/2 cups all-purpose flour
  • 1 1/2 cups sugar
  • 1 1/2 teaspoons baking soda
  • 3/4 teaspoon baking powder
  • 3/4 teaspoon salt
  • 2 large eggs
  • 3/4 cup warm water
  • 3/4 cup buttermilk
  • 3 tablespoons vegetable oil
  • 1 teaspoon pure vanilla extract
  1. Preheat oven to 350 degrees. Line standard muffin tins with paper liners; set aside.
  2. Sift together cocoa powder, flour, sugar, baking soda, baking powder, and salt into a large bowl. 
  3. Add eggs, warm water, buttermilk, oil, and vanilla, and mix until smooth, about 3 minutes. Scrape down the sides and bottom of bowl to assure batter is well mixed.
  4. Divide batter evenly among muffin cups, filling each 2/3 full. 
  5. Bake until tops spring back when touched, about 20 minutes, rotating pan once if needed. (It took only 15 minutes for me so make sure to check them early!)
  6. Transfer to a wire rack; let cool completely.

Now for the frosting. You make one frosting base, then split it into two bowls. And turn one into Bailey's and one into Kahlua.

Butter Cream Frosting Base
  • 3 large egg whites, at room temperature
  • ¾ cup sugar
  • Pinch salt
  • 1 cup unsalted butter, room temperature and cut into 16 pieces
  1. Combine egg whites and sugar in a large heat proof bowl. Set the bowl over (not on) simmering water in a sauce pan and heat, whisking constantly until sugar has dissolved. The mixture is ready when with it is very warm to the touch, about 2 minutes and approximately 160 degrees on an instant read thermometer.
  2. Remove from mixture from heat and transfer to a stand mixer bowl and beat on high until egg white mixture is fluffy, led to room temperature and holds stiff peaks, about 6 minutes.
  3. Turn the speed to medium low, add salt and the butter a few pieces at a time, beating well after each addition. Turn the speed to high and beat until mixture is creamy, about 3-5 minutes more. Evenly split buttercream into two separate bowls.

Bailey’s and Chocolate Kahlua Frostings

  • To make the Baileys buttercream add 3 tablespoons of Baileys into one bowl and beat until combined.
  • To make the Chocolate Kahlua Frosting in the other bowl, add 2 tablespoons of unsweetened cocoa powder, 4 oz of melted semi-sweet chocolate and 3 tablespoons of Kahlua and beat until combined.

Friday, October 19, 2012

Vanilla Bean & Dark Chocolate

Vanilla Bean Cupcakes with Hershey Special Dark Buttercream Frosting


Sometimes simple is perfect! Especially when its 9:30PM the night before your potluck at work! I almost forgot to make these, and for a split second I considered just buying cupcakes to bring..... don't worry! It was a short split second and I came to my senses!

So my Vanilla Bean Cupcakes are probably my most requested cupcake ever. Its got high quality madagascar bourbon vanilla and vanilla bean paste (that's what makes them so much better than all the other vanilla cupcakes!)


The cupcake recipe originally came from the Cupcake Project, but I have posted it several times in this blog.

Here it is again:


Vanilla Cupcakes (from Cupcake Project)
Yield: 16 cupcakes
  • 1 cup granulated sugar 
  • 1 T vanilla bean paste 
  • 1 3/4 cake flour 
  • 1 1/2 teaspoons baking powder
  • 1/2 teaspoon baking soda 
  • 1/2 teaspoon salt 
  • 1/4 cup unsalted butter, room temperature 
  • 2 large eggs, room temperature 
  • 1/3 cup full-fat sour cream 
  • 1/4 cup canola oil 
  • 1 tablespoon pure vanilla extract 
  • 2/3 cup whole milk 
1. Preheat oven to 350 F

2. In a small bowl, combine sugar and vanilla bean paste

3. Mix together cake flour, baking powder, baking soda, and salt.

4. Add the vanilla sugar and mix until well combined.

5. Add butter and mix on medium-low speed for three minutes.

6. In a small mixing bowl, whisk together eggs, sour cream, oil, and vanilla extract until smooth.

7. Add the egg mixture to the flour mixture and beat on medium speed until just combined.

8. Slowly add milk and mix on low speed until just combined.

9. Fill cupcake liners 1/4 of the way up. Place a mini-cupcake on top, cover with additional batter.

10. Bake for 14 minutes

11. When the cupcakes are done, remove them immediately from the tins.

Mmmm fresh out of the oven!
And here is the Chocolate frosting. Sean really wanted them to have this frosting (it is his favorite of all time!)

It originally came from Martha Stewart, but I have tweaked it some.

Dark Chocolate Frosting
This makes enough to frost about 25-30 cupcakes depending on how much you use on each cupcake.... I put the left-over frosting in the fridge so I can use it again this weekend.... maybe I will try and send Ben some more cupcakes!

  • 4 1/2 cups powdered sugar
  • 1 cup Hershey's Special Dark cocoa powder
  • 12 tablespoons (1 1/2 sticks) unsalted butter, room temperature
  • 1/2 cup whole milk, room temperature
  • 2 teaspoons pure vanilla extract
  1. Combine the powdered sugar and cocoa powder
  2. Add the butter, milk, and vanilla
  3. Beat until Smooth
  4. Add more powdered sugar if frosting is too thin.
  5. Pipe onto dipped cupcakes (I used my Wilton #1M tip)

And of course I have to test one.... or three... to make sure they are good!

The best part about these was it only took about 45 mins from start to finish...including cool-down time! Fast, Easy, Simple.... and still Delicious!

Friday, October 12, 2012

How to Ship Cupcakes?....Attempt #3


Gosh, this is my 3rd time trying this and I just can't see to get it right! I'm starting to get frustrated with this.

Here's a quick re-cap:

Attempt #1 - Complete and Utter disaster

Attempt #2 - Very close, but the container came open during shipment

Attempt #3 - Failed again. But I came closer... read below.

So this time around, since my cupcake container popped open during shipment and created a bit of a mess for Ben, I decided I was going to make certain that it could NOT come open this time around.


So I taped it up real good. Ben's exact words: "You really made this thing hard to open"

LOL. I guess I did.

But did the case come open? Nope! However, I had a different problem:


The heat got to them and they MELTED!


Yikes. But at least the cupcake part of them was still in-tact. (And Ben still ate them!)

So, I may have sent them regular mail (1st mistake)... And I may have mailed them on a Saturday, leaving a dead time day on Sunday (2nd mistake).... And that Saturday happened to be the Saturday before Columbus Day, leaving 2 dead time days where my cupcakes were sitting at the post office waiting to be mailed (3rd mistake).

Oops.

So, Of course I already have a new plan devised:

1. Do not ship on a Saturday.
2. Do not send by regular mail. Instead send overnight.
3. Do not send right before a holiday.
4. Send in a climate control box/cooler with ice packs to keep them from melting.

I'm gonna remember the pretty before picture again:


And I haven't given up yet! I'll post again on my next attempt, and hopefully they will make it all the way to Texas un-harmed. (this task is not as easy as I thought when I first declared I would figure it out!)

Chocolate PB Cupcakes!

A Rich Chocolate Cupcake with Delicious Peanut Butter Frosting


I made these cupcakes last weekend, and they got rave reviews. The peanut butter frosting is rich and creamy without being too sweet. The chocolate cupcake was light and fluffy. An overall winner!

Well, these would be the subject of my next attempt to ship cupcakes to my brother, Ben in Texas. More to come on that story later. 


The recipe is from How Sweet Eats, a blog that I am obsessed with!

Now, I didn't stuff the cupcakes with the PB frosting, I think that might have been too much. And I probably should have added a bit more cream to the frosting, it was very thick....but it ended up working!


Chocolate Cupcakes:
made about 16 cupcakes for me
  • 1 1/8 cups all purpose flour
  • 1/4 cup dark cocoa powder
  • 1 1/4 teaspoon baking soda
  • 1/2 teaspoon salt
  • 3/4 cup brown sugar
  • 1 egg
  • 1 teaspoon vanilla extract
  • 1/2 cup milk
  • 1/2 cup + 1 tablespoon heavy cream
  • 1/2 cup butter, melted
  • 2 tablespoons sour cream
  • 1/4 cup homemade fudge sauce (recipe below)
  1. Preheat oven to 350 degrees.
  2. In a bowl, whisk egg and sugar until smooth and no lumps remain. 
  3. Add milk, cream, butter and vanilla, and mix until combined. 
  4. Stir in sour cream. 
  5. Sift dry ingredients together and add to wet mixture. 
  6. Mix until batter is smooth, then swirl in fudge sauce.
  7. Line a muffin tin with liners and using a 1/4 cup measure, add batter to each cup. 
  8. Bake for 15-18 minutes. Let cool before frosting.
Mmm... fresh out of the oven!
Fudge Sauce
This made way more than enough! Next time I would halve this recipe.
  • 1 cup sugar
  • 1 cup dark cocoa powder
  • 2 tablespoons flour
  • pinch of salt
  • 1 cup boiling water or scalding milk
  • 1 tablespoon of butter
  • 1 teaspoon of vanilla
  1. Combine sugar, cocoa, salt, and flour in a bowl over a double boiler. 
  2. Bring water or milk to a boil. 
  3. Gradually add hot liquid to sugar mixture. Stir constantly until mixture thickens.
  4. Once it has reached the desired thickness, remove from heat and stir in butter and vanilla. 
Peanut Butter Buttercream
So simple and easy to make!
  • 1/2 cup butter, softened
  • 2/3 cup peanut butter
  • 3-4 cups of powdered sugar
  • 1 teaspoon vanilla extract
  • 1-2 tablespoons of heavy cream
  1. Cream butter and peanut butter together in the bowl of an electric mixer. 
  2. Add powdered sugar with mixer on low speed and gradually add milk and vanilla extract. 
  3. Mix until frosting is smooth. If too thick, add more milk; if too thin, add more sugar. Frost cupcakes as desired.
Yummy!
And as I finish up this post, I really wish I had more of these!

Sugar-Free Dark Chocolate Tart


OK, so I know I don't have the prettiest picture of these, but they were delicious nonetheless.

My dad's birthday was last week, so I decided to try out a new sugar-free recipe, since he has already tried my sugar-free chocolate cupcakes.

This one turned out AMAZING. Nobody could tell that they were sugar-free!

The recipe is adapted from the Nourishing Gourmet.

This is the first time I have ever worked with Coconut Oil. Which is surprisingly NOT what I expected. Here's a pic:


Its more like shortening than oil. Actually, its nothing like oil. It was interesting to work with.

So here's the recipe:

Crust: 

Grease a spring-form pan with coconut oil, and set aside.
  • 2 cups of almonds
  • 1/4 cup of cocoa powder
  • 1/2 cup of whole wheat flour
  • 2/3 cup of coconut oil softened 
  • 1/4 cup of DiabetiSweet (you can get it here)
  • 1 teaspoon vanilla extract 
  • 1/2 teaspoon salt
  1. Preheat the oven to 400 degrees.
  2. Place almonds in a food processor, and process until a coarse flour. 
  3. Add the rest of the ingredients and process until it forms a uniform dough. 
  4. Press down into the greased pan and bake for 8-12 minutes or until the top is slightly browned.
  5. Take out of the oven and cool. 
  6. Once the crust is cool, making the filling.
Filling:
  • 8 ounces of unsweetened chocolate
  • 2 tablespoons coconut oil 
  • 1/2 cup of Diabeti-sweet 
  • 1 1/2 cups of coconut cream (I could not find coconut cream, so I used heavy cream and added a few drops of coconut extract, which I happened to have in my pantry).
  • Dash of salt
  • 2 tablespoons brewed coffee (I used chocolate flavored coffee)
  1. Finely chop the chocolate and place it in a medium size, heatproof bowl. 
  2. Add the coconut oil and the sugar, mix it into the chopped chocolate a little.
  3. Heat the coconut cream (or heavy cream) on the stove until very hot. 
  4. Pour over the chocolate. Let this sit for about one minute to start melting the chocolate. 
  5. Using a rubber spatula, slowly stir together until it is all uniformly mixed in.
  6. Add the coffee and stir until incorporated. 
  7. Pour this over the crust and carefully place it in the fridge to set for at least 1 hour.
MMM, yummy filling!

Monday, September 3, 2012

Cute Kitty Cupcakes

Kitty cupcakes modeled after Hello, Cupcake's "Fat Cats Cupcakes". I don't have the book, so I was reading it on Google Books here.


Aren't they just so cute??

The gray one is my favorite!

But the orange one is cute too...this one has a messed up eye though :(

So, here is what you'll need:

my basket at Schnucks....got some weird look at 8am with only candy!

  • Basic Chocolate Cupcake -- I used a VERY easy recipe from Baking Bites. I halved the recipe to only make 12 cupcakes. 
  • 2 Jars of Vanilla Icing -- I usually hate pre-made frosting, but that is what the book called for. And it was so much work putting them together, I just went with the easy pre-made stuff. 
  • Red, Yellow, and Black food coloring. I use Wilton's colors.
  • Famous Chocolate Wafers -- I had no idea what these were. Turns out they are like oreo's without the filling. These are for the ears. 
  • 2 packages of mentos -- for the face
  • 1 box of runts -- you only need the heart shaped ones for the nose
  • 1 package of starburst -- you only need 3 red ones for the tongues
  • Black gel icing to draw the sleeping eyes

Ready for the instructions? It really wasn't too hard at all!

STEP 1: Bake 12 chocolate cupcakes. Any recipe will work. Here is the one I used

MMM, yummy! And it make exactly 12 cupcakes

STEP 2: Make up your icing. Take 1 cup of icing and place it in a piping or ziploc bag. This will be for the face. Divide the remaining icing into two bowls and tint one gray (using a little bit of black coloring), and the other one orange (using red and yellow coloring). These will be for the fur. Place each color into its own piping or ziploc bag. 

Note: Use only a little bit of black coloring, and let sit for 10 minutes. The black coloring will darken up over time, so be careful not to add to much at the beginning.

Then Snip 1/8 inch off the corner of each bag.


STEP 3:  Carefully using a serrated knife, make 2 parallel vertical cuts into the wafer cookies about 3/4 of an inch from the edges. This will leave 2 curved pieces that will become the ears. You will need to cut up 12 cookies (or more if the cookies break..... I think I went through like 25 or 30 cookies!)

The pieces you need look like this:


STEP 4:  Attach the cookie ears to the cupcakes using a little bit of icing. They should be sticking about an inch over the edge of the cupcakes. 

Like this:

At this point, I was afraid they would look more like bunnies than kitties!

STEP 5: Time to add some fur! Start by piping lines of frosting onto the ears. Then work your way around the edges of the face, moving inward. Squeeze the frosting onto the cupcake, and quickly pull away so that it makes little tufts of fur. Repeat around the whole face, overlapping the fur as you move inward. But make sure to leave a circle un-frosted at the base for the face. 


Repeat the same process with the white, filling in the gap you left. The white should overlap on top of the orange/gray fur. 

STEP 6: Prepare the face accents:
  1. Make sure you have 24 mentos (which is 2 packs). I only bought 1 pack, and had to make a run to the store for more!
  2. Dig 12 red runt hearts out of the huge box you got. 
  3. Hope that your starburst package has at least 3 red starburst in it. Mine had exactly 3.
  4. Cut each red starburst into quarters. Pop into the microwave for 5 seconds, then mold into little teardrop shapes for the tongues.
So Many Runts!

STEP 7:  Assemble the Kitties!
  1. Place 2 mentos side by side on the white section of your kitty. 
  2. Place a red heart above the mentos for the nose
  3. Place the teardrop shaped starburst below the mentos, with the skinny side at the top for the tongue. 
  4. Using the black gel icing, draw 2 sleepy eyes above the white section of the face. 
  5. Step back and admire your work!

The book also made some of them with mini m&ms for eyes, but I thought the sleepy eyes were cuter, so I made them all sleeping :)


Now, I know its hard to believe because these are so adorable, but Sean does not want to take them to work!! He is "Too Embarrassed" by their cuteness!


Oh well, I guess I will have to find someone else to share them with! I don't think anyone else would complain about them  ;)

So many kitties!


Wednesday, August 29, 2012

Death by Oreo Cupcakes


It has been waaaayy too long since I have blogged some cupcakes. Lately, I have been making my Vanilla Bean and Chocolate Xtreme cupcakes like crazy! No one seems to want to try something new!

Well, I decided to make some awesome Oreo cupcakes last night for Sean's co-workers. But my cupcake baking adventure had some mishaps... don't know what was wrong with me last night!

So I forgot to add the boiling water to the batter... but I lucked out because they still turned out delicious, just really dense! Because I forgot the water, I only got 24 cupcakes (versus the 30 that I was supposed to get!). 


Then, I started making the frosting and forgot to add the sugar to the egg whites. I ended up with fluffy cooked egg whites instead of a nice swiss meringue buttercream. But I had enough eggs to do it over, and the second time it came out great! The only thing I would change would be to add more sugar; the frosting wasn't quite as sweet as I would like it to be.

Since shop n save didn't have mini Oreos, I topped them with shards of regular Oreos. I think that worked out just fine!

So here's the recipe. This came from A Cup Full of Cake.

Chocolate Cupcakes
(supposed to make 28-30)
  • 3 cups flour
  • 2 cups sugar
  • 1/2 cup Hershey Special Dark Cocoa Powder
  • 2 teaspoons baking soda
  • 1/2 teaspoon salt
  • 1 cup whole milk
  • 4 ounces bittersweet chocolate melted and cooled (I use 60% dark Ghirardelli)
  • ½ cup plus 1 tbsp boiling water
  • 3/4 cup vegetable oil
  • 2 large eggs
  • 2 tablespoons white vinegar 
  • 1 tablespoon vanilla
  • 24-30 Oreos 
excuse my dirty pan! 
  1. Preheat oven to 350F with rack in the center.
  2. Carefully twist off one side of the oreo and place the half with the cream filling down, filling side up in the bottom of each liner (Save the tops to garnish)
  3. Whisk together the dry ingredients (sugar, flour, cocoa powder, baking soda and salt) in a large bowl.
  4. In a large bowl or bowl of stand mixer whisk eggs till slightly thickened and a pale color
  5. Add in the milk, vanilla, oil and vinegar and whisk/beat well
  6. Add in the melted and cooled chocolate and whisk/beat until combined well
  7. Either add the flour mixture into the wet ingredients OR the wet into the flour and mix just to combine. 
  8. Add in the boiling water and mix again just to combine. 
  9. Fill each cupcake liner 3/4 of the way with batter. 
  10. Bake 15-18 minutes or until toothpick inserted in the middle comes out clean.
  11. Let cool for 5 min in pans and then remove carefully to a wire cooling rack. Cool completely before frosting
Oreo Frosting
  • 5 large egg whites
  • 1 cup plus 2 tbsp granulated sugar
  • 2 cups (4 sticks) unsalted butter, room temperature, cut into tablespoon sized pieces
  • 1 1/2 tsp teaspoon vanilla extract
  • pinch salt
  • Oreo cookie crumbs (14 whole oreos, pulse in food processor until you get very fine crumbs)
  1. Place sugar and egg whites in the heat-proof bowl of an electric mixer. Set bowl over a pan of gently simmering water, and whisk until sugar has dissolved and egg whites are hot to the touch, about 3 minutes. Test by rubbing the mixture between your fingers; it should feel completely smooth.
  2. Transfer bowl to mixer stand. Using the whisk attachment, beat on high speed until mixture has cooled completely and formed stiff and glossy peaks, about 10 minutes.
Stiff Glossy Peaks should look something like this

    3.  Add the butter, one piece at a time, and beat until incorporated after each addition.
    4.  Switch to the paddle attachment, and beat on the low speed for a few minutes.
    5.  Add in the oreo cookie crumbs and beat to incorporate
    6.  Pipe onto cupcakes (I used Wilton #2D)

My camera decided to add some crazy lighting effects to this one

These were very rich, and the light airy frosting complemented the dark chocolate cupcake very nicely! And even with my little mess-ups they still turned out great. Now I wish I just had some more, I sent them all to work with Sean!

Sunday, June 10, 2012

Cinnamon Toast Crunch Cupcakes

Cinnamon Cupcakes with a Cinnamon Toast Crunch Cream Cheese Frosting


Well, along with the Vanilla Swirl Cupcakes, Nicci asked me to make some Cinnamon Toast Crunch Cupcakes for her graduation party.

They turned out pretty amazing, and I got lots of compliments on them. I am not too big of a fan of cream cheese icing, but this one was pretty exceptional.


I got the recipe from Your Cup of Cake. The recipe turned out pretty good, and from this blog, I have a bunch more recipes on my to-do list, especially since this one turned out so yummy! :)


Cinnamon Cake:
  • 3 eggs
  • 1/3 cup oil
  • ¾ cup buttermilk
  • 1 teaspoon vanilla extract
  • ¾ cup sour cream (full-fat)
  • Vanilla Cake Mix (I used Moist Supreme)
  • 1 ½ teaspoon cinnamon
  1. Preheat oven to 350 degrees and line pans cupcake liners.
  2. In a large bowl, gently combine eggs, oil, buttermilk and vanilla.
  3. Mix in sour cream.
  4. Add cake mix and cinnamon and mix until smooth.
  5. Stir in lightly crushed cereal.
  6. Fill cupcake liners ¾ full and bake for 15-18 minutes, or until an inserted knife comes out clean.


Cinnamon Toast Crunch Icing:
  • 8 oz cream cheese, softened
  • ½ cup butter, softened
  • 1 teaspoon vanilla
  • 3 cups powdered sugar
  • 2/3 cup Cinnamon Toast Crunch powder (put cereal in food processor and measure out 2/3 cup of the fine powder)
  1. Beat cream cheese and butter until fluffy. 
  2. Add Cinnamon Toast Crunch powder. 
  3. Add vanilla and powdered sugar. 
  4. Pipe onto cooled cupcakes and top with Cinnamon Toast Crunch squares.


Missouri S&T Graduation Swirl Cupcakes


My sister's college graduation party was this weekend, she graduated from Missouri S&T where the main color is green.


I wanted to dress up the Vanilla Bean cupcakes that were requested, so I decided to try an icing swirl, and I think it turned out pretty cool.


It's pretty simple:
  1. Separate your frosting into 2 batched. 
  2. Color one batch green (or whatever color you like). 
  3. Then put each icing into separate bags, no tips. Cut the tip off of each bag. 
  4. Put into a larger bag fitted with a swirl tip, like Wilton 1M. Put the two bags into the larger bag, making sure that the tips of each icing bag go into the swirl tip. 
  5. Pipe onto cupcakes.
It's that simple!

The piping bag


Tuesday, May 29, 2012

Oreo Birthday Cake

Oreo Cake for Two Birthdays


My mom and I have always shared a birthday party and cake....her birthday is the day after mine! And, its always on Memorial Day weekend, so I always have a day off work!

Side View

Well, this year we went to Chili's for lunch and I made our cake. (I know, I know....your not supposed to make your own cake....but I LOVE making cakes, and frankly mine are way better than store-bought. I prefer to make my own cake)

This recipe is from Taste of Home. And it was very delicious! (and pretty easy to make!)

Top View

The waiters at Chili's had been eyeing my cake throughout the entire lunch and people kept asking me where I bought it.... I love when people think my cakes are professional! : )

I decided to leave a few pieces for the drooling staff, and one of them even said "This is the best cake I have ever had!" And a few of them said they would pay a lot of money for a cake like that!

So, here it is. The recipe says it yields 12 servings.... but those would be gigantic slices. I cut the cake in about 19 slices and they were plenty big enough.

Ingredients
  • 1 package (18-1/4 ounces) white cake mix (I used Moist Supreme)
  • 1-1/4 cups water
  • 1/3 cup canola oil
  • 3 egg whites
  • 1 cup coarsely crushed Oroes (I used double-stuff Oreos)
Frosting
  • 1/2 cup shortening
  • 4 to 4-1/2 cups confectioners' sugar
  • 1/4 cup milk
  • 1 teaspoon vanilla extract

In the oven! I use Bake-Even strips to keep the cake even on top

Mmmmm.... Yummy!

Directions
  1. In a large bowl, combine the cake mix, water, oil and egg whites; beat on low speed for 30 seconds. Beat on high for 2 minutes. Gently fold in crushed cookies.
  2. Pour into two greased and floured 9-in. round baking pans. Bake at 350° for 30-35 minutes or until a toothpick inserted near the center comes out clean. Cool for 10 minutes before removing from pans to wire racks to cool completely.
  3. For frosting, beat the shortening, sugar, milk and vanilla in another large bowl until smooth. 
  4. Spread frosting on bottom layer, sprinkle with crushed cookies
  5. Top with second layer and spread frosting on top and sides.
  6. Decorate the top with half Oreos around the top edge, and finely crushed Oreos on the sides. 
  7. Place one Oreo top in the center of the cake.


Related Posts Plugin for WordPress, Blogger...