Showing posts with label buttercream. Show all posts

Wednesday, June 3, 2015

Brown Sugar Buttermilk Cupcakes with Salted Caramel Buttercream


I made these cupcakes for my mom's first day at her new job! She wanted a vanilla based cupcake because she doesn't like chocolate... I know, crazy, right? 

Anyways, for the first time in a long time I felt like trying something new for cupcakes. Now I have made the salted caramel buttercream before, but they were atop my usual chocolate cupcake. 

I decided to go with a brown sugar buttermilk cupcake, and they turned out wonderful! You can really taste the brown sugar, and it gives it a sweetness that really went great with the caramel. The buttermilk makes them denser with a creamier texture. 

Below is the recipe which I got from 52 Kitchen Adventures. The batter turned out super thick, almost like cookie dough.

Brown Sugar Cupcakes
Makes ~18 cupcakes

  • 1 1/2 cups flour
  • 1 teaspoon baking powder
  • 1/4 teaspoon sea salt
  • 1 stick of unsalted butter, at room temperature
  • 1 cup plus 2 tablespoons packed light brown sugar
  • 2 large eggs, at room temperature
  • 1 teaspoon vanilla
  • 1/2 cup plus 2 tablespoons buttermilk
  • Preheat oven to 325 °F. Line muffin tin with paper or foil liners.

  1. In a medium bowl, combine flour, baking powder and salt.
  2. In a large bowl, cream butter and brown sugar until pale and fluffy. Add eggs one at a time, beating after each until fully incorporated. Mix in vanilla extract. Add flour mixture to wet ingredients in 3 batches, alternating with 1/2 of the buttermilk, stirring after each until everything is combined.
  3. Pour batter into prepared muffin tin until each liner is 3/4 full. Bake for around 25 minutes or until a toothpick inserted in the center comes out clean.


While the cupcakes were in the oven, I made the caramel for the frosting....and I actually did it right the first time! Every other time I have tried to make my own caramel, it comes out burnt, so I was super excited. Here's a pic of me making the caramel:


Here is the recipe for the caramel buttercream:

Salted Caramel Buttercream (from Fearless Homemaker)
(makes enough to frost 12 cupcakes)
  • 1/4 cup granulated sugar
  • 2 tablespoons water
  • 1/4 cup heavy cream
  • 1 teaspoon vanilla extract
  • 1 stick salted butter
  • 1 stick unsalted butter
  • 1/2 teaspoon sea salt
  • 2 cups powdered sugar
  1. in a saucepan, stir together granulated sugar + water. bring to a boil over medium high heat. cook without stirring until mixture turns a light amber color. remove from heat + slowly add in cream + vanilla, stirring until very smooth. let caramel cool for about 20 minutes, until it is just barely warm, but still pour-able.
  2. in a mixer fitted with paddle attachment, beat butter + salt together until lightened + fluffy. reduce speed to low + add powdered sugar. mix until thoroughly combined.
  3. scrape down the side of the bowl + add the caramel. beat on medium high speed until light + airy, + completely mixed (about 2 minutes). mixture should be ready to use without refrigeration. if your caramel was too hot when added, it will cause your icing to be runny – if this happens refrigerate for 15-20 minutes.
My go-to classic frosting tip is Wilton 1M or 2D, which is what I used here. These would also be cute with a french tip swirl too.

For the Caramel Flowers:

This is super simple! I just used worther's chewy caramel candies and rolled them out with a rolling pin. Then used a tiny flower cutout and piped a dot of frosting in the middle. They were super cute and super easy! (And I got to eat the leftover caramel pieces... Yum!)


I am still waiting to hear the verdict from mom's new co-workers, but I certainly scarfed down one of them! I love the frosting because its got a hidden saltiness. The salt is not overwhelming, but its there in the background!

My mom actually helped me make these, and every time we bake together I realize just how different our styles are! But its still fun and we do work well together! She is super clean, and I am just about the messiest baker there is, lol! And for buttercream frosting, I have make about a million bajillion of them and can pretty much make them with my eyes closed... so I have a tendency not to measure and just dump some powdered sugar, milk, and vanilla in and taste test. Mom freaked a bit when I just threw some salt in without carefully measuring! But they turned out great anyways!

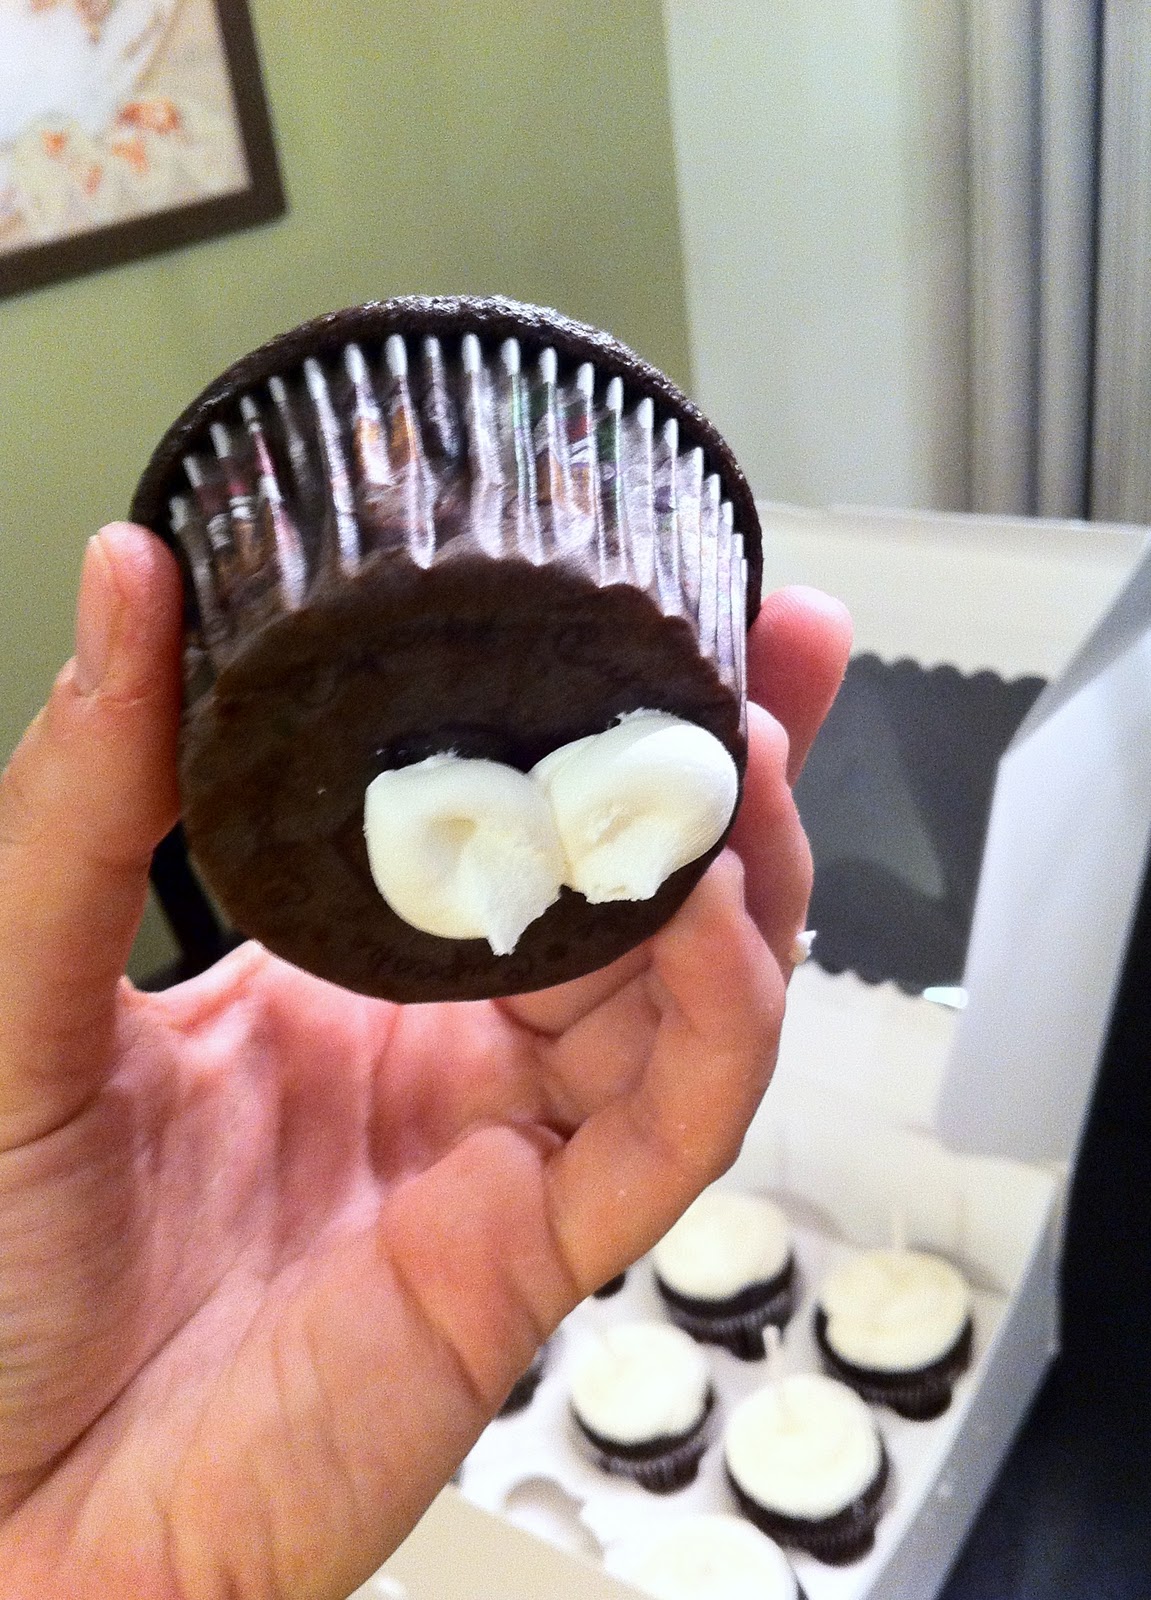
Wish I had more creative pictures, but I am limited on counter space in my tiny studio apartment!

Until next time, here's one last pic of these beauties!


Saturday, November 12, 2011

Reese's Cupcakes

Chocolate Cupcake with a Mini Reese's Baked Inside, Frosted with a Peanut Butter Buttercream and topped with Reese's Bits


My favorite candy? Reese's cups, hand's down! I have been dying to make a cupcake around those little cups of goodness!

And now I have the perfect opportunity: my boyfriend's Grandpa is having a birthday dinner this weekend, and when I was naming off flavors, he said he liked peanut butter. Well, what goes with peanut butter better than chocolate?


The Cake:

I used my go-to chocolate cupcake recipe as a base (posted here).

Before baking, press 1 Frozen Reese's cup into each cupcake. It is very important that the Reese's Cups are VERY Frozen so that they hold their shape while baking. I kept mine in the freezer for a few days.


The Frosting: 

Wilton's Peanut Butter Buttercream, with a very slight modification
  • 1/3 cup solid vegetable shortening
  • 1/3 cup butter, room temperature
  • 3/4 cup creamy peanut butter
  • 1 teaspoon pure vanilla extract
  • 4 cups powdered sugar
  • 4-6 tablespoons heavy whipping cream
  1. Cream shortening and butter with electric mixer. 
  2. Add peanut butter and vanilla. 
  3. Gradually add sugar, one cup at a time, beating well on medium speed.  
  4. Add cream, one tablespoon at a time, and beat at medium speed until light and fluffy.
Pipe frosting onto cupcakes (I used tip 8B) and top with chopped up mini Reese's bits. (I pulsed mine a few times in my mini-food processor, came out with nice bits to sprinkle on)

My Aunt gave me these CUTE cupcake plates!


Wednesday, November 9, 2011

Dulce De Leche Cupcakes

Vanilla Bean Cupcake, Filled with Dulce de Leche, Frosted with a Dulce de Leche Buttercream


I am usually not a think-ahead kind of person when it comes to cupcakes. I usually think up an idea and do it right away. Well, this recipe calls for at least 8 hours of planning ahead, the time it takes to make Dulce de Leche.

I, like a lot of people, always thought Dulce de Leche and Caramel were one in the same. However, they are actually 2 different things. Caramel is made out of heated sugar. Dulce de Leche is made out of heated sweetened milk, but they have a similar taste and texture.

Making Dulce de Leche was actually quite easy. Instead of making it the traditional way of constantly stirring a pot of milk and sugar on the stove, I put 2 cans of Sweetened Condensed Milk in a crock pot, set it on low with and 8 hour timer and went to work. When I came home, I had 2 cans of delicious Dulce de Leche, which I could literally eat with a spoon it was so good!

Step 1: Make the Dulce de Leche (you will need 8 hours). I got this idea from the Cupcake Project.

In the Crock Pot
  1. Remove the labels from 2 cans of sweetened condensed milk
  2. Place in a crock pot and cover completely in water. This is important, if its not covered in water, the cans will explode. 
  3. Set it on low for 8 hours and wait. 
  4. Make sure the cans are cooled before opening to reveal the goodness inside. 

Yummy Dulce de Leche!


Step 2: Make the Cupcakes. I am taking this opportunity to try a recipe from my favorite blog (the Cupcake Project)

Vanilla Bean Cupcakes (adapted from cupcake project) I multiplied the recipe by 1.5 so it makes 24 cupcakes. 
  • 1 1/2 cups sugar
  • 1 1/2 T vanilla bean paste (because I don't have vanilla beans)
  • 2 2/3 cups cake flour, not self-rising
  • 2 1/4 teaspoons baking powder
  • 3/4 teaspoon baking soda
  • 3/4 teaspoon salt
  • 6 T unsalted butter, room temperature
  • 3 large eggs, room temperature
  • 1/2 cup full-fat sour cream
  • 6 T canola oil 
  • 1 1/2 T pure vanillla extract
  • 1 cup whole milk
  1. Preheat oven to 350 F
  2. In a small bowl, combine sugar and vanilla bean paste
  3. Mix together cake flour, baking powder, baking soda, and salt.
  4. Add the vanilla sugar and mix until well combined.
  5. Add butter and mix on medium-low speed for three minutes. 
  6. In a small mixing bowl, whisk together eggs, sour cream, oil, and vanilla extract until smooth.
  7. Add the egg mixture to the flour mixture and beat on medium speed until just combined.
  8. Slowly add milk and mix on low speed until just combined. 
  9. Fill cupcake liners just over 1/2 full.
  10. Bake for 14 minutes
  11. When the cupcakes are done, remove them immediately from the tins.
Baking in the Oven, I think I need to clean the glass!

Step 3: Make the Frosting (adapted from the Culinary Chronicles), I found the recipe whilst searching for a frosting in which to add my Dulce de Leche. 

Dulce de Leche Buttercream
  • 6 cups powdered sugar
  • 1 cup unsalted butter (room temperature)
  • 5 Tablespoons Dulce de Leche
  • 3 T Heavy Cream
  1. Beat the butter until light and fluffy. 
  2. Slowly add in the powdered sugar. 
  3. Add the Dulce de Leche and Cream and beat until combined. 
  4. Pipe onto cupcakes (I used Tip #1M)
The inside, showing the ooey gooey goodness!

These were a very very sweet cupcake! But the recipe is definitely a keeper! Also, as ususal, this cupcake is best after refrigerating for a few hours, the Dulce de Leche stays soft and gooey and the buttercream firms up perfectly!

I'd say these were a hit, everyone kept coming back for more!

Saturday, November 5, 2011

Ghirardelli Truffle Cupcakes

Dark Chocolate Cupcake, filled with a Homemade Milk Chocolate Truffle, topped with a White Chocolate Buttercream. 


I recently took a road trip up to Milwaukee to get a car with my boyfriend. On the way back, we decided to stop in and do some outlet shopping. After visiting the Coach and other outlets, we discovered the Ghirardelli outlet store, (which was Amazing!) and got the Ghirardelli Chocolate Cookbook. All three of these recipes are from the book (however the combination was all me).


Notice the wrappers? They are Reynolds Pre-Baked Liners that I found at Schnucks. They stay bright even after baking, and I am in love with them! I will be definitely buying more of those.

Dark Chocolate Cupcakes
Yield: 24 Cupcakes
  • 1/2 cup Ghirardelli Unsweetened Cocoa
  • 2 1/4 cup flour
  • 2 1/2 teaspoon baking soda
  • 1/2 teaspoon salt
  • 2 large eggs
  • 1 cup firmly packed light brown sugar
  • 1 cup granulated white sugar
  • 1 1/4 cup whole milk
  • 2/3 cup strong brewed coffee or espresso (I used instant espresso powder with boiling water)
  • 1 cup unsalted butter
  1. Preheat the oven to 350°F. Line cupcake tins with paper liners. 
  2. Sift together the flour, cocoa, baking soda and salt. 
  3. In a medium bowl, whisk together the egg, brown sugar, and white sugar. 
  4. Whisk in the milk, coffee, and melted butter. 
  5. Whisk in the dry ingredients. 
  6. Divide the batter evenly among the cupcake molds, filling them about three-quarters full.
  7. Bake for 5 minutes, then insert a truffle into the center of each cupcake (recipe below)
  8. Bake for 10 more minutes
  9. Cool for 10 minutes in the pan.  
  10. Continue to cool on a wire rack to room temperature.
I was a little worried about the domes on top

Milk Chocolate Truffles
Yield: 30 truffles
  • 2 cups Ghirardelli Milk Chocolate Chips
  • 1/3 cup plus 2 tablespoons heavy cream
  • 1/2 tablespoon unsalted butter
  1. In a small saucepan, bring the cream to a simmer. 
  2. Add the butter and stir until melted. 
  3. Add the chocolate chips. Stir until completely melted and smooth. 
  4. Remove from the heat and pour into a shallow bowl.
  5. Cool, cover, and refrigerate the mixture until firm, at least 2 hours. (I am impatient so it went into the freezer to speed this up)
  6. Using a small scoop or small spoon, roll the mixture into 1/2 inch to 1 inch balls. 
  7. Freeze until hardened and ready to insert in cupcakes
Sadly, I don't have a picture of the truffles themselves, but they turned out well. I expected them to be a solid mass in the center after baking, but it seems they just dissolved into the dark chocolate batter. 

See: no definitive truffle after baking

Even though the truffle did not stay a solid mass as expected, these are pretty delicious! They got rave reviews at dinner tonight. (I was even called 'the most amazing baker ever'!) Smiles!

White Chocolate Swiss Meringue Buttercream
  • 12 oz Ghirardelli White Chocolate bar
  • 8 large egg whites
  • 2 C plus 4 T sugar
  • 2 C plus 4 T unsalted butter, at room temperature
  • 1 tsp pure vanilla extract
  • White Chocolate Chips to garnish
  1. Melt the white chocolate baking bar in the top of a double boiler, or in a heatproof bowl over barely simmering water, stirring occasionally until smooth. Cool to room temperature. 
  2. While the chocolate is cooling, combine the egg whites and sugar in the bowl of an electric mixer. 
  3. Place the bowl in a pot of simmering water so the water comes a third of the way up the bowl. 
  4. Lightly whisk the egg whites just until hot to the touch, about 1-1/2 minutes. 
  5. Remove the bowl from the pot on whisk on high speed until very thick and cooled to room temperature, about 5 minutes. 
  6. Decrease the mixer to medium-low speed and add the butter, 1 tablespoon at a time, mixing the butter in before adding the next tablespoon. 
  7. Add the melted white chocolate and vanilla and mix until smooth. 
  8. Frost the top of each cupcake (I used tip #1A) and sprinkle them with the white chocolate chips.
This recipe was a swiss meringue buttercream, which I despise and love at the same time. It is temperamental and time-consuming, but delicious. I almost thought I messed it up when it came out super liquidy, but a little time in the freezer and a really good whip up on super-high level with the mixer turned it around. This frosting would be great on a white cupcake too, delicious in its own right.


After getting these frosted, they were surprisingly heavy, but the perfect density. I recommend refrigerating them a bit before enjoying.

Saturday, October 29, 2011

Spooky Halloween Cupcakes

I made these Halloween Cupcakes for my Aunt to share with her co-workers. I used my go-to chocolate cupcake as a base, then topped it with a vanilla buttercream frosting colored orange that I got from the Cupcake Project. Then I topped them with assorted piped chocolate decorations.


My Go-To Chocolate Cupcakes are posted here. They are delicious with any kind of frosting!

Orange Vanilla Bean Buttercream (from the Cupcake Project)

Ingredients
1 1/2 cup powdered sugar
1/2 cup unsalted butter, room temperature
2 teaspoons vanilla bean paste
1 tablespoon milk
1/4 teaspoon red gel food coloring (add more or less to color)
1/2 teaspoon yellow gel food coloring (add more or less to color)

Directions
  1. Mix together sugar and butter until they are blended and creamy. 
  2. Add vanilla bean paste, milk, and food coloring and continue to beat for another minute. 
  3. Pipe on cooled cupcakes, I used tip #1A
Pre-Decoration


Chocolate Decorations
  1. Draw designs on paper and place beneath a sheet of wax paper as an outline. 
  2. Melt 4 oz of milk chocolate and 4 oz of white chocolate (separately) over double-boiler. 
  3. Fill piping bag fitted with a small circle tip 
  4. Trace outlines with the chocolate
  5. Place in Freezer to set.
  6. Add to cupcakes as garnish

They ended up really cute! I did have quite a few mess-ups before I got some usable decorations, but in the end they turned out really good!

The Finished Product


Thursday, October 13, 2011

How to Ship Cupcakes?


My brother is in his freshman year at Texas Tech University, which is exciting, but a long way away from home (St. Louis, MO). Ever since he moved down there I have been trying to find a way to ship cupcakes without them being destroyed.

Well, through all my research, I have come up with a few ideas to try. He gets yummy cupcakes on one condition: Send me a picture of what arrives to document my attempt.

Update 10/14/11: Scroll down and see why this is NOT the best way to ship cupcakes....learn from my mistakes! The cupcakes were fantastic before they left though!

Step 1: Buy a cupcake box with cupcake inserts. I got mine from here.

Step 2: Bake cupcakes, I chose to try out America’s test kitchen chocolate cupcakes. My boyfriend turned me on to them last year and it’s actually a pretty cool show that has apparently been on TV for years. You have to have a subscription to view their recipes, but I re-posted it below. Since then, I have wanted to try this so-called perfect cupcake, only without the filling because that’s too much work for an experiment in shipping cupcakes. Then I went searching for a “sturdy” icing and found this one from Colleen’s Recipes.

Chocolate Cupcakes (from America’s test kitchen)
  • 3ounces bittersweet chocolate , chopped fine 
  • 1/3 cup cocoa powder
  • 3/4 cup hot coffee
  • 3/4 cup cake flour 
  • 3/4 cup sugar 
  • 1/2 teaspoon table salt 
  • 1/2 teaspoon baking soda 
  • 6 tablespoons vegetable oil 
  • 2 large eggs 
  • 2 teaspoons white vinegar 
  • 1 teaspoon vanilla extract 
  1. Adjust oven rack to middle position and heat oven to 350 degrees. 
  2. Place chocolate and cocoa in medium bowl. Pour hot coffee over mixture and whisk until smooth. Set in freezer to cool completely, about 10 minutes. 
  3. Whisk flour, sugar, salt, and baking soda together in medium bowl; set aside. 
  4. Whisk oil, eggs, vinegar, and vanilla into cooled chocolate-cocoa mixture until smooth. 
  5. Add flour mixture and whisk until smooth. 
  6. Divide batter evenly among 12 muffin pan cups. Bake until cupcakes are set and just firm to touch, about 17 minutes. 
  7. Cool cupcakes in muffin pan on wire rack until cool enough to handle, about 10 minutes. Carefully lift each cupcake from muffin pan and set on wire rack. Cool to room temperature before frosting. 
  8. Repeat. I don’t have a bowl big enough to hand whisk a doubled recipe, so I did it twice. 
This was a fantastic chocolate cupcake! I would make it again and again because it was sooo easy! They are the perfect density and have a great but not overpowering chocolate flavor.

Sturdy Buttercream Frosting (from Colleen’s Recipes)
  • 1 cup white Crisco shortening
  • 1 cup butter (room temperature) 
  • 6½ cups of powdered sugar
  • ½ cup whipping cream
  • 2 teaspoons vanilla extract
  • 1 teaspoon almond extract 
  1. In the large bowl of a stand mixer, whip the shortening and butter together for about 3 minutes on high. 
  2. Add 6 cups of powdered sugar, the extracts and whipping cream to the butter mixture and whip ON HIGH for about 10 minutes. 
  3. Let set in freezer for 5-10 minutes before piping. 
This makes a lot of icing, so you may want to cut it in half.

Step 3: Pipe icing in a swirl on cupcakes, I used Wilton tip #6B


Step 4: Put a stick in the cupcakes to the height of the box. I used cookie pop sticks I had lying around. The idea behind this is to keep the cupcakes from tipping over as much as possible. They are kind of ugly, but worth a shot. 

With the sticks in them


Step 5: Put a dab of Royal Icing on the bottom of each cupcake, and then put into box. The royal icing will harden and act as a glue to keep the cupcakes from sliding around or tipping over (hopefully). 

I had two holes in my Ziploc accidentally, lol!

Royal Icing: Makes about 1 ½ cups icing, which is more than you need. Cut in half if you want.
  • 1 1/2 Tablespoons Meringue Powder 
  • 2 cups Powdered Sugar 
  • 2 1/2 Tablespoons warm water 
Beat all ingredients until icing forms peaks (7-10 minutes at low speed)

Step 6: Freeze Overnight, this will harden the royal icing, and the cupcakes to keep them as sturdy as possible. 

In the freezer to set

Step 7: Stick box of cupcakes in another box. I put “This Side Up” in great big letters in hopes that USPS would listen.

Step 8: Send them off and hope they make it there intact. USPS didn't listen to my note! The first thing she does is flip it over! It cost me $37 to ship it overnight, Can't wait to see how they turn out!

Before Picture: 
So pretty in the box! I really hope they stay that way! 
There will be an Update as soon as my brother receives the batch of cupcakes! Wish them luck on their journey! 
After Picture:
What a Mess!!!

UPDATE 10/14/11: As you can see this was NOT the best way to ship cupcakes! Sad Face!! Oh, well. I suppose I will do some more research and try again. He said he was still gonna eat them, lol!


Saturday, October 8, 2011

Mimosa's for Brunch

A.K.A. The Champagne Adventures: Part 3


You might wonder where parts 1 and 2 are, well my adventures with Champagne started several weeks ago with the ‘Strawberries and Champagne’ idea. Sounds perfect right? Well, getting the Champagne part of the equation right proved to be more difficult than expected.

First I tried a Champagne Glaze from the Cupcake Project, but that just made the cupcakes soggy and sticky, not to mention the mess it made of my kitchen!

Then, I tried a different recipe from the Cupcake Project for a Champagne Mascarpone Frosting. It was good, but not great. It didn’t quite taste like Champagne. Probably because it didn’t actually have Champagne in it; Champagne Flavoring was the substitute. It also started to melt off the cupcakes when sitting out on the counter for a couple of hours.

Well, I didn’t want to settle for just a good recipe, so I was still searching for the perfect Champagne frosting. Since my White Wine Cupcakes turned out fantastically, I thought “Why not substitute the wine for Champagne?” I also thought, since Champagne has a weak flavor, I would add a couple drops of the flavoring I had left over. It turned out great! Sweet, with a subtle Champagne flavor and was a stiffer consistency.

Now on to the Mimosas! We had a family brunch (well brunch/lunch...i'm not sure you can call it brunch after 11am) this morning, so I figured Mimosa Cupcakes would go along perfectly. An orange cupcake with Champagne frosting in one hand and a mimosa drink in the other!

Orange Cupcakes (From the Cupcake Project)

These were denser cupcakes, but tasted good. The batter was VERY orange-y, but it baked out to a light orange flavor.

Ingredients:
2/3 C sugar (for the zest)
finely grated zest of 1 orange
1 C orange juice concentrate
1/2 C sugar (for the concentrate)
2 C flour
1 1/2 t baking powder
1/2 t baking soda
3/4 C butter, room temperature
2 eggs
2/3 C plain yogurt

Directions:
1. A few hours before you are ready to bake, combine the orange zest and the sugar in a bowl. This will let the orange flavor infuse into the sugar.

2. While you are waiting, prepare an orange syrup by bringing the orange juice concentrate and sugar to a boil in a saucepan. Stir continuously until it is thoroughly combined and gets slightly thicker (about 10 minutes). Remove from heat and return to room temperature. 

Should look like this:

3. With a fork, whisk flour, baking powder, and baking soda in a bowl.

4. Beat butter and the sugar with grated orange zest in a large bowl for 1 minute, until light and fluffy.

5. Beat in eggs and yogurt until blended.

6. Alternately fold in flour mixture and 2/3 cup of the orange syrup (that should be pretty much all of the syrup) in three additions, beginning and ending with flour.

7. Fill cupcake liners 3/4 full.

8. Bake at 350 F for about 25 minutes or until a toothpick comes out of the cupcake clean.


White Chocolate Champagne Buttercream Frosting (Adapted fromWe are not Martha)

Ingredients:
1 1/2 C unsalted butter, softened
6 oz. white chocolate (I use Ghirardelli Bars)
3 1/2 C powdered sugar
4 teaspoons Champagne (you can add extra to taste)
3 drops Champagne Flavoring (you can order it here)

Directions:

1. Melt white chocolate on the stove in a double boiler

2. Cream the butter at medium speed until it looks light and fluffy (3-4 minutes)

3. Beat in melted white chocolate

4. Add 1/2 C powdered sugar, then 1/2 teaspoon Champagne, making sure each is incorporated before adding the next. Repeat until all the powdered sugar and Champagne are blended in. Add in the Champagne flavoring.

5. If it's too thin, put the bowl of icing in the freezer for 10-15 minutes to thicken it up, and then give it a good beating with the mixer before filling your piping bag.

6. Pipe icing onto cupcakes. I used my mom's new tip # 2D for these.


Monday, October 3, 2011

White Wine Cupcakes

A Vignoles Cupcake frosted with White Chocolate Vignoles Buttercream,  Yummy!


Over the past few years, I have become obsessed with two things: Cupcakes and Wine. Strangely, I have never married the two obsessions....until now!

Last weekend, I took a trip out to the wineries in Hermann, MO. We stopped by Hermannhof first, which is usually my favorite, but they were a bit stingy with the tastings this time. Then it was on to Oak Glenn, which has mediocre wine but a great view. And we saved the best for last: Stone Hill Winery.

It was then I discovered a buy one, get one free deal on cases of Vignoles wine, one of my favorite sweet wines. Needless to say I came home with 24 bottles of it! As I was unpacking my wine, I got the idea to try and create a cupcake out of the delicious stuff. I went searching and found this recipe from 'We Are Not Martha'. I have only adapted it slightly.

Here it is re-posted with my edits:

Vignoles Cupcakes

Ingredients
• 2/3 C unsalted butter, softened
• 1 1/2 C sugar
• 2 3/4 C flour
• 3 teaspoons baking powder
• 1 teaspoon salt
• 3/4 C Vignoles Wine (It originally called for Riesling, but Vignoles substituted nicely)
• 1 C egg whites (I use the kind already made up called All Whites)

Directions
1. Preheat oven to 350 degrees
2. Cream together the butter and sugar, until light and fluffy.
3. In a separate bowl, Sift together the flour, baking powder, and salt together.
4. Mix the dry ingredients into the butter mixture, alternating with the wine.
5. In yet another separate small bowl, beat your egg whites until stiff peaks form. This took about 3-5 minutes and will not resemble egg whites anymore. It looks more like fluffy, airy....something.
6. Fold the egg whites into the batter.
7. Scoop batter into pans and bake for 18 minutes. 

They come out nice and golden:


White Chocolate Vignoles Buttercream Icing

Ingredients
• 1 1/2 C unsalted butter, softened
• 6 oz. white chocolate (I use Ghirardelli Bars)
• 3 1/4 C powdered sugar
• 2 teaspoons Vignoles Wine

Directions
1. Melt white chocolate on the stove in a double boiler
2. Cream the butter at medium speed until it looks light and fluffy (3-4 minutes)
3. Beat in melted white chocolate
4. Add 1/2 C powdered sugar, then 1/2 teaspoon Vignoles wine, making sure each is incorporated before adding the next. Repeat until all the powdered sugar and wine are blended in. 
5. Put the bowl of icing in the freezer for 10-15 minutes to thicken it up, then give it a good beating with the mixer before filling your piping bag. 
6. Pipe icing onto cupcakes. (To get the pretty swirl, use the Wilton 1M tip. I tend to use this tip ALL the time because that's the only one I have...I need to stock up my tip collection!)

The finished product:


This cupcake was very light and airy, the perfect cupcake to enjoy on a nice evening with a glass of wine! It was sweet, but not too sweet, and the cake itself had a very nice texture! This one is for sure a keeper!


Related Posts Plugin for WordPress, Blogger...