Wednesday, November 23, 2011

First try of Salted Caramel Frosting

Chocolate Cupcakes with a Salted Caramel Buttercream, Garnished with a Caramel Piece


I have been seeing a lot of recipes lately using Salted Caramel Frosting. I have always thought to myself that it must taste disgusting! Why would you want a cupcake to have salt as a main flavor?

Well....I was wrong! By request, I made a salted caramel buttercream, and actually LOVED it! Up until the frosting was done, I was freaking out about them being inedible. Since they were not for me, I had no plan B if they turned out bad. Luckily, they didn't!


I used my go-to chocolate cupcake (recipe posted here). But, instead of my usual chocolate flavored coffee, I used a Caramel Drizzle flavored coffee:


This coffee is amazing on its own, and I thought it would make the chocolate cake go that much better with the caramel in the frosting!

Another issue I ran into: The dreaded moment when you are in the middle of a recipe and reach in the cabinet only to find what you need isn't there!! I was out of bittersweet chocolate. But, since I was not going back to the store (I had been earlier that day), I used Semi-Sweet chocolate and Dark Cocoa Powder instead. In the end, you couldn't tell a difference. 

For the frosting, I found this recipe from Fearless Homemaker:

The first step is to make caramel. When I read that I thought, no biggie, I've done this before! (see my previous post from Apple Pie Cupcakes). Well, like the first time I tried to make caramel, I burned it! But luckily I had enough ingredients to try it again with no problems! 

One thing I can't seem to get is the "deep Amber color" that most recipes claim you need to get. Maybe I don't know what "deep amber" looks like because every time I wait for it to turn that color, it tastes burnt and nasty. I would call the un-burnt end product a "light amber" color.

Salted Caramel Buttercream (from Fearless Homemaker)
(makes enough to frost 12 cupcakes)
  • 1/4 cup granulated sugar
  • 2 tablespoons water
  • 1/4 cup heavy cream
  • 1 teaspoon vanilla extract
  • 1 stick salted butter
  • 1 stick unsalted butter
  • 1/2 teaspoon sea salt
  • 2 cups powdered sugar
  1. in a saucepan, stir together granulated sugar + water. bring to a boil over medium high heat. cook without stirring until mixture turns a deep amber color. remove from heat + slowly add in cream + vanilla, stirring until very smooth. let caramel cool for about 20 minutes, until it is just barely warm, but still pour-able.
  2. in a mixer fitted with paddle attachment, beat butter + salt together until lightened + fluffy. reduce speed to low + add powdered sugar. mix until thoroughly combined.
  3. scrape down the side of the bowl + add the caramel. beat on medium high speed until light + airy, + completely mixed (about 2 minutes). mixture should be ready to use without refrigeration. if your caramel was too hot when added, it will cause your icing to be runny – if this happens refrigerate for 15-20 minutes.
To make the Caramel Leaves:

This is really simple, get some of those square caramels from the candy aisle, roll em out with a rolling pin until they are big enough to fit a cookie cutter, and cut out the leaves. I used Wilton's Fall Mini-Cookie Cutter Set. I think they are sooo cute. To get the details, use a toothpick to make the markings, I also curved up the edges to get some dimension. 

The End Product!


Cupcakes in Cupcakes!

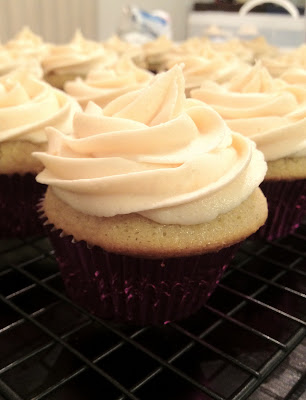
My latest creation was baking chocolate iced chocolate cupcakes into vanilla iced vanilla cupcakes! It turned out well:


The cupcakes tasted delicious! The chocolate cupcake was the perfect center to a vanilla cupcake!

Mini Chocolate Cupcakes (from Martha Stewart)
Yield: Makes 18 to 24 full cupcakes (you can cut this in half)
  • 3/4 cup unsweetened cocoa powder 
  • 1 1/2 cups all-purpose flour 
  • 1 1/2 cups sugar 
  • 1 1/2 teaspoons baking soda 
  • 3/4 teaspoon baking powder 
  • 3/4 teaspoon salt 
  • 2 large eggs 
  • 3/4 cup warm water 
  • 3/4 cup buttermilk 
  • 3 tablespoons canola oil 
  • 1 teaspoon pure vanilla extract 
1. Preheat oven to 350 degrees. Line standard muffin tins with paper liners; set aside. Sift together cocoa powder, flour, sugar, baking soda, baking powder, and salt into a large bowl. Add eggs, warm water, buttermilk, oil, and vanilla, and mix until smooth, about 3 minutes. Scrape down the sides and bottom of bowl to assure batter is well mixed.

2. Divide batter evenly among muffin cups, filling each 2/3 full. Bake until tops spring back when touched, about 20 minutes, rotating pan once if needed. Transfer to a wire rack; let cool completely.

Chocolate Frosting (adapted from Martha Stewart)
  • 2 1/4 cups powdered sugar 
  • 1/2 cup Hershey's Special Dark cocoa powder 
  • 6 tablespoons (3/4 stick) unsalted butter, room temperature 
  • 1/4 cup whole milk, room temperature 
  • 1 teaspoons pure vanilla extract 
1. Combine the powdered sugar and cocoa powder

2. Add the butter, milk, and vanilla

3. Beat until Smooth

4. Add more powdered sugar if frosting is too thin 

5. Freeze thoroughly

Mini Cupcakes (they stuck to the wrappers a bit)
These mini cupcakes paired with the dark chocolate buttercream were divine on their own!

Vanilla Cupcakes (from Cupcake Project)
Yield: 16 cupcakes
  • 1 cup granulated sugar 
  • 1 T vanilla bean paste 
  • 1 3/4 cake flour 
  • 1 1/2 teaspoons baking powder
  • 1/2 teaspoon baking soda 
  • 1/2 teaspoon salt 
  • 1/4 unsalted butter, room temperature 
  • 2 large eggs, room temperature 
  • 1/3 cup full-fat sour cream 
  • 1/4 cup canola oil 
  • 1 tablespoon pure vanilla extract 
  • 2/3 cup whole milk 
1. Preheat oven to 350 F

2. In a small bowl, combine sugar and vanilla bean paste

3. Mix together cake flour, baking powder, baking soda, and salt.

4. Add the vanilla sugar and mix until well combined.

5. Add butter and mix on medium-low speed for three minutes.

6. In a small mixing bowl, whisk together eggs, sour cream, oil, and vanilla extract until smooth.

7. Add the egg mixture to the flour mixture and beat on medium speed until just combined.

8. Slowly add milk and mix on low speed until just combined.

9. Fill cupcake liners 1/4 of the way up. Place a mini-cupcake on top, cover with additional batter.

10. Bake for 14 minutes

11. When the cupcakes are done, remove them immediately from the tins.

Vanilla Frosting (from Cupcake Project)
  • 3 cups confectioners' sugar (add more until it reaches your preferred consistency) 
  • 1cup unsalted butter, room temperature 
  • 4 teaspoons vanilla bean paste (add more to taste) 
  • 2 tablespoon milk 
1. Mix together sugar and butter until they are blended and creamy.

2. Add vanilla bean paste and milk and continue to beat for another minute.

3. If desired, add more vanilla bean paste to taste, or more confectioners' sugar to make it stiffer

Big and Little Cupcakes

Tuesday, November 15, 2011

Mmmmm... Pecans!

Maple Pecan Cupcakes with a Butter Pecan Frosting


I love pecans, so I have been thinking about baking these cupcakes for a while now...and I had an itch to bake tonight! These are from Paula Deen's website, although I originally heard about them on Cupcake Project, where else?

Well, since I have been consuming so many cupcakes lately, I am on a diet...so I had to give all but one away to my mom and her co-workers (they are 500 cal. a piece in case you were wondering...i know, yikes!)

Maple Pecan Cupcakes (from Paula Deen)
  • 1 ½ cups all-purpose flour
  • ¾ cup finely crushed pecans 
  • 1 ½ teaspoons baking powder
  • ½ teaspoon baking soda
  • ½ teaspoon salt
  • ½ cup sugar
  • ½ cup pure maple syrup
  • ½ cup unsalted butter, room temperature
  • 2 large eggs, room temperature
  • ½ teaspoon vanilla extract
  • 2/3 cup whole milk
  • 1 cup roughly chopped pecans
  1. Preheat oven to 350 F.
  2. In a medium-sized mixing bowl or bowl of a stand mixer, mix together flour, crushed pecans, baking powder, baking soda, and salt.
  3. Mix in the sugar and maple syrup until fully combined.
  4. Add the butter and mix on medium-low speed for three minutes. 
  5. Mix in the eggs and vanilla until just combined.
  6. Mix in the milk until just combined.
  7. Fold in the chopped pecans.
  8. Bake for 20 minutes or until cupcakes bounce back when lightly touched.
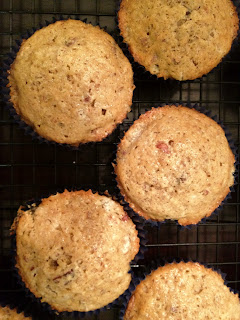
Texture is more like a Muffin than a Cupcake.


Butter Pecan Frosting
  • 1 cup + 2 tablespoons unsalted butter, room temperature
  • 1 cup roughly chopped pecans
  • Pinch salt
  • 3 cups powdered sugar
  • 1 tablespoon + 1 teaspoon vanilla extract
Cooked Buttered Pecans

  1. To prepare the butter pecans, melt two tablespoons of butter in a small skillet over medium low heat.
  2. Add pecans and salt to the skillet. Cook for six to eight minutes, stirring periodically, until almost all of the butter is absorbed. Remove from heat, but leave in the skillet.
  3. To prepare the frosting, in a medium-sized mixing bowl or the bowl of a stand mixer, mix remaining one cup of butter on medium-low speed for three minutes or until light and fluffy.
  4. Slowly mix in powdered sugar until fully combined.
  5. Mix in vanilla until fully combined.
  6. Scrape the cooled pecans and any butter left in the skillet into the frosting and fold in.
They were a little hard to frost with the pecan pieces!

Saturday, November 12, 2011

Reese's Cupcakes

Chocolate Cupcake with a Mini Reese's Baked Inside, Frosted with a Peanut Butter Buttercream and topped with Reese's Bits


My favorite candy? Reese's cups, hand's down! I have been dying to make a cupcake around those little cups of goodness!

And now I have the perfect opportunity: my boyfriend's Grandpa is having a birthday dinner this weekend, and when I was naming off flavors, he said he liked peanut butter. Well, what goes with peanut butter better than chocolate?


The Cake:

I used my go-to chocolate cupcake recipe as a base (posted here).

Before baking, press 1 Frozen Reese's cup into each cupcake. It is very important that the Reese's Cups are VERY Frozen so that they hold their shape while baking. I kept mine in the freezer for a few days.


The Frosting: 

Wilton's Peanut Butter Buttercream, with a very slight modification
  • 1/3 cup solid vegetable shortening
  • 1/3 cup butter, room temperature
  • 3/4 cup creamy peanut butter
  • 1 teaspoon pure vanilla extract
  • 4 cups powdered sugar
  • 4-6 tablespoons heavy whipping cream
  1. Cream shortening and butter with electric mixer. 
  2. Add peanut butter and vanilla. 
  3. Gradually add sugar, one cup at a time, beating well on medium speed.  
  4. Add cream, one tablespoon at a time, and beat at medium speed until light and fluffy.
Pipe frosting onto cupcakes (I used tip 8B) and top with chopped up mini Reese's bits. (I pulsed mine a few times in my mini-food processor, came out with nice bits to sprinkle on)

My Aunt gave me these CUTE cupcake plates!


Wednesday, November 9, 2011

Dulce De Leche Cupcakes

Vanilla Bean Cupcake, Filled with Dulce de Leche, Frosted with a Dulce de Leche Buttercream


I am usually not a think-ahead kind of person when it comes to cupcakes. I usually think up an idea and do it right away. Well, this recipe calls for at least 8 hours of planning ahead, the time it takes to make Dulce de Leche.

I, like a lot of people, always thought Dulce de Leche and Caramel were one in the same. However, they are actually 2 different things. Caramel is made out of heated sugar. Dulce de Leche is made out of heated sweetened milk, but they have a similar taste and texture.

Making Dulce de Leche was actually quite easy. Instead of making it the traditional way of constantly stirring a pot of milk and sugar on the stove, I put 2 cans of Sweetened Condensed Milk in a crock pot, set it on low with and 8 hour timer and went to work. When I came home, I had 2 cans of delicious Dulce de Leche, which I could literally eat with a spoon it was so good!

Step 1: Make the Dulce de Leche (you will need 8 hours). I got this idea from the Cupcake Project.

In the Crock Pot
  1. Remove the labels from 2 cans of sweetened condensed milk
  2. Place in a crock pot and cover completely in water. This is important, if its not covered in water, the cans will explode. 
  3. Set it on low for 8 hours and wait. 
  4. Make sure the cans are cooled before opening to reveal the goodness inside. 

Yummy Dulce de Leche!


Step 2: Make the Cupcakes. I am taking this opportunity to try a recipe from my favorite blog (the Cupcake Project)

Vanilla Bean Cupcakes (adapted from cupcake project) I multiplied the recipe by 1.5 so it makes 24 cupcakes. 
  • 1 1/2 cups sugar
  • 1 1/2 T vanilla bean paste (because I don't have vanilla beans)
  • 2 2/3 cups cake flour, not self-rising
  • 2 1/4 teaspoons baking powder
  • 3/4 teaspoon baking soda
  • 3/4 teaspoon salt
  • 6 T unsalted butter, room temperature
  • 3 large eggs, room temperature
  • 1/2 cup full-fat sour cream
  • 6 T canola oil 
  • 1 1/2 T pure vanillla extract
  • 1 cup whole milk
  1. Preheat oven to 350 F
  2. In a small bowl, combine sugar and vanilla bean paste
  3. Mix together cake flour, baking powder, baking soda, and salt.
  4. Add the vanilla sugar and mix until well combined.
  5. Add butter and mix on medium-low speed for three minutes. 
  6. In a small mixing bowl, whisk together eggs, sour cream, oil, and vanilla extract until smooth.
  7. Add the egg mixture to the flour mixture and beat on medium speed until just combined.
  8. Slowly add milk and mix on low speed until just combined. 
  9. Fill cupcake liners just over 1/2 full.
  10. Bake for 14 minutes
  11. When the cupcakes are done, remove them immediately from the tins.
Baking in the Oven, I think I need to clean the glass!

Step 3: Make the Frosting (adapted from the Culinary Chronicles), I found the recipe whilst searching for a frosting in which to add my Dulce de Leche. 

Dulce de Leche Buttercream
  • 6 cups powdered sugar
  • 1 cup unsalted butter (room temperature)
  • 5 Tablespoons Dulce de Leche
  • 3 T Heavy Cream
  1. Beat the butter until light and fluffy. 
  2. Slowly add in the powdered sugar. 
  3. Add the Dulce de Leche and Cream and beat until combined. 
  4. Pipe onto cupcakes (I used Tip #1M)
The inside, showing the ooey gooey goodness!

These were a very very sweet cupcake! But the recipe is definitely a keeper! Also, as ususal, this cupcake is best after refrigerating for a few hours, the Dulce de Leche stays soft and gooey and the buttercream firms up perfectly!

I'd say these were a hit, everyone kept coming back for more!

Monday, November 7, 2011

Chocolate Xtreme Cupcakes

Chocolate Cake with Chips in the batter, Filled with Whipped Ganache, dipped in Ganache, Frosted with Dark Chocolate Frosting, and Garnished with Chocolate Curls. 


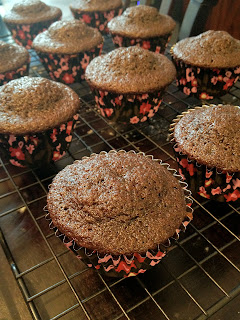
I have been dreaming up this perfect chocolate cupcake for weeks now, and have been waiting for the perfect opportunity to actually put it all together. My boyfriend had a potluck lunch at his work today, and since he is now 'the cupcake guy' at Toyota (thanks to all the cupcakes I send with him), I just had to make some for him to bring. (The red liners were for Toyota spirit).

Step 1: Bake Chocolate Cake (my go to chocolate cupcake is posted here). Add about 2/3 cup semi-sweet chocolate chips to the batter.

I got impatient and stuck the cupcakes in the freezer to cool. They have to be completely cool before filling.

Baked and Cooled Cupcakes

Step 2: Make a Semi-Sweet Ganache (2 ways)

  • 2 bars Ghirardelli Semi-Sweet Chocolate (8 oz)
  • 1 1/3 C Heavy Cream
  • 4 T butter
  1. Heat the cream in a saucepan until it simmers
  2. Add in the butter and cook until melted
  3. Pour over chocolate and stir together
  4. Divide into 2 bowls
  5. Put one bowl in an ice bath and whisk until cooled and fluffy (for filling)
  6. Set other bowl aside (for dipping)
Yummy Ganache for Dipping

Step 3: Fill Cupcakes with Whipped Ganache
  1. I used a Bismark Tip (Wilton #230) to fill them. 
  2. Put your fluffy Ganache into a piping bag. 
  3. Insert tip into center of cupcake. 
  4. Squeeze some filling into center, you have to guess because you can't see how much is going in. 
Alternatively, you can use a paring knife to cone out the cupcake, add the filling, then replace the top. I find that it makes a mess if you do it that way, and the Bismark Tip is well-worth getting!

Filling the Cupcakes

Step 4: Dip the Cupcakes

Simply dip the cupcakes into the Ganache that you set aside. Make sure its still warm, or heat it up some. Don't worry about it looking pretty, because it will get covered in frosting. 

After getting dipped

Step 5: Prepare Frosting 

I took Martha Stewart's Ultimate Chocolate Frosting and altered it a bit to give it a dark chocolate flavor, turned out even better than I expected!
  • 4 1/2 cups powdered sugar
  • 1 cup Hershey's Special Dark cocoa powder
  • 12 tablespoons (1 1/2 sticks) unsalted butter, room temperature
  • 1/2 cup whole milk, room temperature
  • 2 teaspoons pure vanilla extract
  1. Combine the powdered sugar and cocoa powder
  2. Add the butter, milk, and vanilla
  3. Beat until Smooth
  4. Add more powdered sugar if frosting is too thin.
  5. Pipe onto dipped cupcakes (I used my Wilton #1M tip)
Step 6: Sprinkle some chocolate curls on top. I picked mine up at Dierberg's when I ran across them. I was originally planning on sprinkling some chocolate jimmies on top, but the curl's ended up being the perfect garnish. 

The finished product!

Step 7: Enjoy! (you may need a glass of milk, as these are super rich and chocolaty!)

The inside, to see the filling

I had a half of one last night, and literally was dreaming of it while I slept, it was that good!

Saturday, November 5, 2011

Ghirardelli Truffle Cupcakes

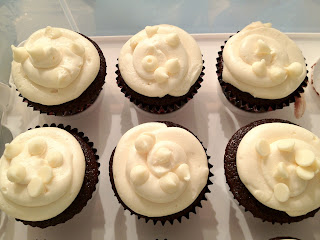
Dark Chocolate Cupcake, filled with a Homemade Milk Chocolate Truffle, topped with a White Chocolate Buttercream. 


I recently took a road trip up to Milwaukee to get a car with my boyfriend. On the way back, we decided to stop in and do some outlet shopping. After visiting the Coach and other outlets, we discovered the Ghirardelli outlet store, (which was Amazing!) and got the Ghirardelli Chocolate Cookbook. All three of these recipes are from the book (however the combination was all me).


Notice the wrappers? They are Reynolds Pre-Baked Liners that I found at Schnucks. They stay bright even after baking, and I am in love with them! I will be definitely buying more of those.

Dark Chocolate Cupcakes
Yield: 24 Cupcakes
  • 1/2 cup Ghirardelli Unsweetened Cocoa
  • 2 1/4 cup flour
  • 2 1/2 teaspoon baking soda
  • 1/2 teaspoon salt
  • 2 large eggs
  • 1 cup firmly packed light brown sugar
  • 1 cup granulated white sugar
  • 1 1/4 cup whole milk
  • 2/3 cup strong brewed coffee or espresso (I used instant espresso powder with boiling water)
  • 1 cup unsalted butter
  1. Preheat the oven to 350°F. Line cupcake tins with paper liners. 
  2. Sift together the flour, cocoa, baking soda and salt. 
  3. In a medium bowl, whisk together the egg, brown sugar, and white sugar. 
  4. Whisk in the milk, coffee, and melted butter. 
  5. Whisk in the dry ingredients. 
  6. Divide the batter evenly among the cupcake molds, filling them about three-quarters full.
  7. Bake for 5 minutes, then insert a truffle into the center of each cupcake (recipe below)
  8. Bake for 10 more minutes
  9. Cool for 10 minutes in the pan.  
  10. Continue to cool on a wire rack to room temperature.
I was a little worried about the domes on top

Milk Chocolate Truffles
Yield: 30 truffles
  • 2 cups Ghirardelli Milk Chocolate Chips
  • 1/3 cup plus 2 tablespoons heavy cream
  • 1/2 tablespoon unsalted butter
  1. In a small saucepan, bring the cream to a simmer. 
  2. Add the butter and stir until melted. 
  3. Add the chocolate chips. Stir until completely melted and smooth. 
  4. Remove from the heat and pour into a shallow bowl.
  5. Cool, cover, and refrigerate the mixture until firm, at least 2 hours. (I am impatient so it went into the freezer to speed this up)
  6. Using a small scoop or small spoon, roll the mixture into 1/2 inch to 1 inch balls. 
  7. Freeze until hardened and ready to insert in cupcakes
Sadly, I don't have a picture of the truffles themselves, but they turned out well. I expected them to be a solid mass in the center after baking, but it seems they just dissolved into the dark chocolate batter. 

See: no definitive truffle after baking

Even though the truffle did not stay a solid mass as expected, these are pretty delicious! They got rave reviews at dinner tonight. (I was even called 'the most amazing baker ever'!) Smiles!

White Chocolate Swiss Meringue Buttercream
  • 12 oz Ghirardelli White Chocolate bar
  • 8 large egg whites
  • 2 C plus 4 T sugar
  • 2 C plus 4 T unsalted butter, at room temperature
  • 1 tsp pure vanilla extract
  • White Chocolate Chips to garnish
  1. Melt the white chocolate baking bar in the top of a double boiler, or in a heatproof bowl over barely simmering water, stirring occasionally until smooth. Cool to room temperature. 
  2. While the chocolate is cooling, combine the egg whites and sugar in the bowl of an electric mixer. 
  3. Place the bowl in a pot of simmering water so the water comes a third of the way up the bowl. 
  4. Lightly whisk the egg whites just until hot to the touch, about 1-1/2 minutes. 
  5. Remove the bowl from the pot on whisk on high speed until very thick and cooled to room temperature, about 5 minutes. 
  6. Decrease the mixer to medium-low speed and add the butter, 1 tablespoon at a time, mixing the butter in before adding the next tablespoon. 
  7. Add the melted white chocolate and vanilla and mix until smooth. 
  8. Frost the top of each cupcake (I used tip #1A) and sprinkle them with the white chocolate chips.
This recipe was a swiss meringue buttercream, which I despise and love at the same time. It is temperamental and time-consuming, but delicious. I almost thought I messed it up when it came out super liquidy, but a little time in the freezer and a really good whip up on super-high level with the mixer turned it around. This frosting would be great on a white cupcake too, delicious in its own right.


After getting these frosted, they were surprisingly heavy, but the perfect density. I recommend refrigerating them a bit before enjoying.

Related Posts Plugin for WordPress, Blogger...