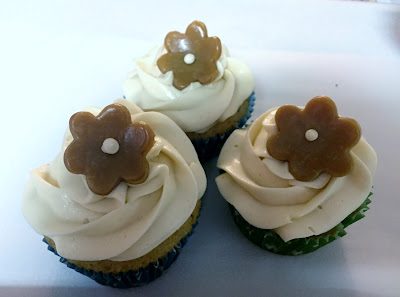
I made these cupcakes for my mom's first day at her new job! She wanted a vanilla based cupcake because she doesn't like chocolate... I know, crazy, right?
Anyways, for the first time in a long time I felt like trying something new for cupcakes. Now I have made the salted caramel buttercream before, but they were atop my usual chocolate cupcake.
I decided to go with a brown sugar buttermilk cupcake, and they turned out wonderful! You can really taste the brown sugar, and it gives it a sweetness that really went great with the caramel. The buttermilk makes them denser with a creamier texture.
Brown Sugar Cupcakes
Makes ~18 cupcakes
- 1 1/2 cups flour
- 1 teaspoon baking powder
- 1/4 teaspoon sea salt
- 1 stick of unsalted butter, at room temperature
- 1 cup plus 2 tablespoons packed light brown sugar
- 2 large eggs, at room temperature
- 1 teaspoon vanilla
- 1/2 cup plus 2 tablespoons buttermilk
- Preheat oven to 325 °F. Line muffin tin with paper or foil liners.
- In a medium bowl, combine flour, baking powder and salt.
- In a large bowl, cream butter and brown sugar until pale and fluffy. Add eggs one at a time, beating after each until fully incorporated. Mix in vanilla extract. Add flour mixture to wet ingredients in 3 batches, alternating with 1/2 of the buttermilk, stirring after each until everything is combined.
- Pour batter into prepared muffin tin until each liner is 3/4 full. Bake for around 25 minutes or until a toothpick inserted in the center comes out clean.
While the cupcakes were in the oven, I made the caramel for the frosting....and I actually did it right the first time! Every other time I have tried to make my own caramel, it comes out burnt, so I was super excited. Here's a pic of me making the caramel:
Here is the recipe for the caramel buttercream:
Salted Caramel Buttercream (from Fearless Homemaker)
(makes enough to frost 12 cupcakes)
- 1/4 cup granulated sugar
- 2 tablespoons water
- 1/4 cup heavy cream
- 1 teaspoon vanilla extract
- 1 stick salted butter
- 1 stick unsalted butter
- 1/2 teaspoon sea salt
- 2 cups powdered sugar
- in a saucepan, stir together granulated sugar + water. bring to a boil over medium high heat. cook without stirring until mixture turns a light amber color. remove from heat + slowly add in cream + vanilla, stirring until very smooth. let caramel cool for about 20 minutes, until it is just barely warm, but still pour-able.
- in a mixer fitted with paddle attachment, beat butter + salt together until lightened + fluffy. reduce speed to low + add powdered sugar. mix until thoroughly combined.
- scrape down the side of the bowl + add the caramel. beat on medium high speed until light + airy, + completely mixed (about 2 minutes). mixture should be ready to use without refrigeration. if your caramel was too hot when added, it will cause your icing to be runny – if this happens refrigerate for 15-20 minutes.
For the Caramel Flowers:
This is super simple! I just used worther's chewy caramel candies and rolled them out with a rolling pin. Then used a tiny flower cutout and piped a dot of frosting in the middle. They were super cute and super easy! (And I got to eat the leftover caramel pieces... Yum!)
I am still waiting to hear the verdict from mom's new co-workers, but I certainly scarfed down one of them! I love the frosting because its got a hidden saltiness. The salt is not overwhelming, but its there in the background!
My mom actually helped me make these, and every time we bake together I realize just how different our styles are! But its still fun and we do work well together! She is super clean, and I am just about the messiest baker there is, lol! And for buttercream frosting, I have make about a million bajillion of them and can pretty much make them with my eyes closed... so I have a tendency not to measure and just dump some powdered sugar, milk, and vanilla in and taste test. Mom freaked a bit when I just threw some salt in without carefully measuring! But they turned out great anyways!
Wish I had more creative pictures, but I am limited on counter space in my tiny studio apartment!
Until next time, here's one last pic of these beauties!


